Felt Activity Book Tutorial
Reuse: Felt
Materials:
*10 sheets of felt:
-4 of same color for main pages of book
-2 of same color for embellishments
-2 of same color for embellishments
-1 flesh colored piece
-1 hair colored piece
*Flexible sew-on Velcro tape
*8 pack of crayons
*Small notepad
I am tweaking my book a little from the original, just because my daughter is too young for tic-tac-toe. So my book will have the coloring page, ABC & 123 page & the doll page.
_First cut out eight(8) 5x7 pages in the same color for the main pages.
**TIP: cut out two pieces of each cut-out below to make felt more durable, then sew together**
Construct pages 1 & 2: Doll dress up
_Draw/trace a doll onto a paper; trace the hair onto a separate page.
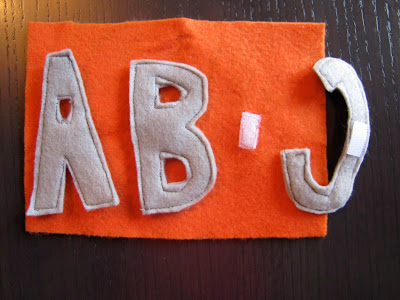
Construct pages 3 & 4: ABCs & 123s
_Draw/trace an "A", "B", & "C" onto two of the pieces of felt & cut. Sew these two pieces together. We will attached these with the Velcro, so cut little squares out for each letter & number. Sew one side to a 5x7 sheet, then adhere letter.
_Draw/trace a "1", "2", & "3" onto one of the pieces of felt.
_Sew 3 squares of Velcro onto each side of the pages.
Construct pages 5 & 6: Coloring
_Sew two 1x5 strips of felt together. Then sew it into place by zig zagging up and down near the edges of the strip.
_Cut two circles, and sew them to cover the zig zag lines.
_Sew two strips of felt, 2 1/2 x 7 together, I used a 1/4" seam at the top & bottom only.
_Sew this to a 5x7 sheet, down the middle. Then sew lines each direction every 3/4".
[oops, mine came out crooked :) ]
_This picture shows the back cover & the crayon page sewed together already, but to make the strap: Cut two 1 1/2"x5" strips, sew together. Round one edge, then attach a side of Velcro (if you are going to sew it, I'd sew it before sewing the two strips together).
_Sew strip onto back cover at about 1/4".
Front cover
_Sew a round piece about 1/4" from edge of the front cover.
_Sew a piece of Velcro on top of the dot.
_You can now sew your pages together. I sewed the front cover to the doll page, Doll accessory page to the ABC page, 123 page to the book page, and the crayon page to the back cover. You should end up with four pages. DO NOT SEW THE INNER SIDE OF THE PAGE!
Binding:
_Cut two piece of 2"x7" strips.
_Tuck them into both sides of the front & back cover pages & sew down the inner side of the page. Leave 1/2" in between. Do the same for the last two pages.
_Finally, lay the inner pages onto of the cover pages & sew down the middle of the binding.
You can make a binding cover if you wish, I chose not to :)


No comments:
Post a Comment