Showing posts with label Decorating. Show all posts

Friday, February 24, 2012

Good Nights Sleep

Ever wonder how some beds are more soft & comfortable than others? Or how to achieve that fluffy look? I know for me, the bedroom is my weakness for decorating! I see a lot of bed stuff I like, but can't ever create them in my room. I came across this video and thought it was SOO helpful. I especially like how she layers the lighter blanket under the heavier one so you can take away a layer if you're too hot (or add it if your cold). I hope to create this idea into my room as well as my daughters.


Check out Martha Stewart's Guest Bedroom Ideas


Check out PB Teen's layering steps


Fresh Home Ideas website


Steps to having a comfy bed:
1. Mattress
2. Mattress Pad
3. Fitted Sheet
4. Flat Sheet
5. Lightweight Blanket
6. Duvet
7. Decorative throw*
8. Pillows

*Optional 


Thursday, December 1, 2011

Christmas time is here!

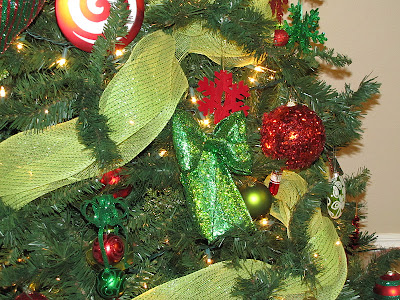
This has got to be my most FAVORITE holiday of the year!! So much to this holiday that I love, including: Christ's birth, Christmas tree's, lights, decorations, shopping, friendly people [for the most part], pretty bows & paper, desserts & SOO much more! This year I chronicled my family building our [fake] tree & decorating. Now, I am including the mantle decor because of the after shot :(  Last night my daughter was trying to change how the lights blink, and in doing so, pulled the entire contents of the mantle off....subsequently breaking all of my oh so lovely stocking holders that I WAITED and WAITED to go on sale last year. :(  Now I'm without stocking holders & I don't even know what to get because I loved these so much haha Pretty sad, I know.


Wednesday, November 23, 2011

Countdown to Thanksgiving // ONE

Thanksgiving Dinner:
For the Love of Cooking blog


Craft:
Thrifty Decorating blog


Tuesday, November 22, 2011

Monday, November 21, 2011

Countdown to Thanksgiving // THREE

Thanksgiving Dinner:
For the Love of Cooking blog


Craft:
Ordinary Miracles of Life blog

[love the rest of her room btw]


Sunday, November 20, 2011

Countdown to Thanksgiving // FOUR

Thanksgiving Dinner:
Kalyn's Kitchen blog


Craft:
Make the Best of Things blog


Saturday, November 19, 2011

Friday, November 18, 2011

Thursday, November 17, 2011

Countdown to Thanksgiving // SEVEN

This time around I thought I'd feature other bloggers ideas, so everything you see in the next days will be from other bloggers pages. 

Thanksgiving Dinner:
Sweet Little Smoothie blog


Craft:
Shakespear's Stage blog


Tuesday, November 15, 2011

Tuesday's Trash to Treasure: Holiday Blocks

Holiday Block Decor Tutorial
Reuse: 2x4 wood

Materials:
*2x4 wood
*Decorative Paper
*Mod Podge
*Stickers/ribbon
*Letters

_Cut your 2x4's into different sizes for each letter. I forget my exact measurements, but mine ranged from 4"-8" tall.
_Sand the tops, edges & blemishes.
_Spray paint the blocks. 

_Cut your paper to cover the fronts of each block. Glue to wood with Mod Podge.


_Glue letters to blocks & apply Mod Podge over the entire fronts. 
_After drying, you can add embellishments if you'd like, or if not, then you're done!


Tuesday, November 8, 2011

Tuesday's Trash to Treasure: Fall Wreath

Fall Wreath Tutorial
Reuse: Sweaters

Materials:
*Sweaters (thicker wool works better)   [I purchased 5 from Salvation army for only $15]
*Scissors, Sewing Materials
*Metal hanger
*Ribbon
*Fabric

_Start by cutting 3" circles from your sweaters. 

_Unbend your wire hanger. Poke through the centers of your sweater circles. Once you've made a wreath shape, twist the ends of the hanger together.

_Cut a 18"x6" piece of fabric. Fold fabric in half, right sides together. Sew around edges, pull fabric right side OUT, then sew shut. I sewed around the edges on the right side once it was sewn shut. Press accordion style. 
_Cut a 30"x4" (or use ribbon) piece of fabric. This will be the tail to your bow. Follow the same steps above, then cut a 3" piece off to use for the bow. 

_Hot glue/sew/pin the 3" piece around the smaller rectangle piece (bow). 

_Tie the tail of the bow onto the wreath. You can then pin the bow to the tail. 


Tuesday, November 1, 2011

Tuesday's Trash to Treasure: Thankful Jar

Today's tutorial isn't necessarily "trash to treasure", but it's something my family is starting today (Nov 1), so thought I'd share the tip!

Reuse: Decorative Jar

Materials:
*Jar
*Paper
*Ribbon
*Tape/Scissors/etc

The idea behind this is, each day until Thanksgiving we want to write something we are thankful for (generic, specific to that day, etc) and put the papers in the jar (doubles as a table centerpiece), and on Thanksgiving we'll read what we were thankful for throughout the month!

Choose your jar, and decorate the outside how you wish! (Sorry, not much inspiration there, so be creative!)


To make the papers, I cut about 1/2"-3/4" strips wide & 8" long. Make your length according to the height of your jar. 


Monday, October 31, 2011

Related Posts Plugin for WordPress, Blogger...